Initial VFD Integration
My initial spindle integration was done on a borrowed spindle, with a borrowed Huanyang VFD (both of the type found all over eBay), side-by-side with the Lenze SMV VFD that I first purchased for my machine. This was mostly a matter of getting over the learning curve of properly programming the various parameters of each VFD. Here, since the spindle was running only for seconds at a time and under no load, the spindle was uncooled – but try that only at your own risk.
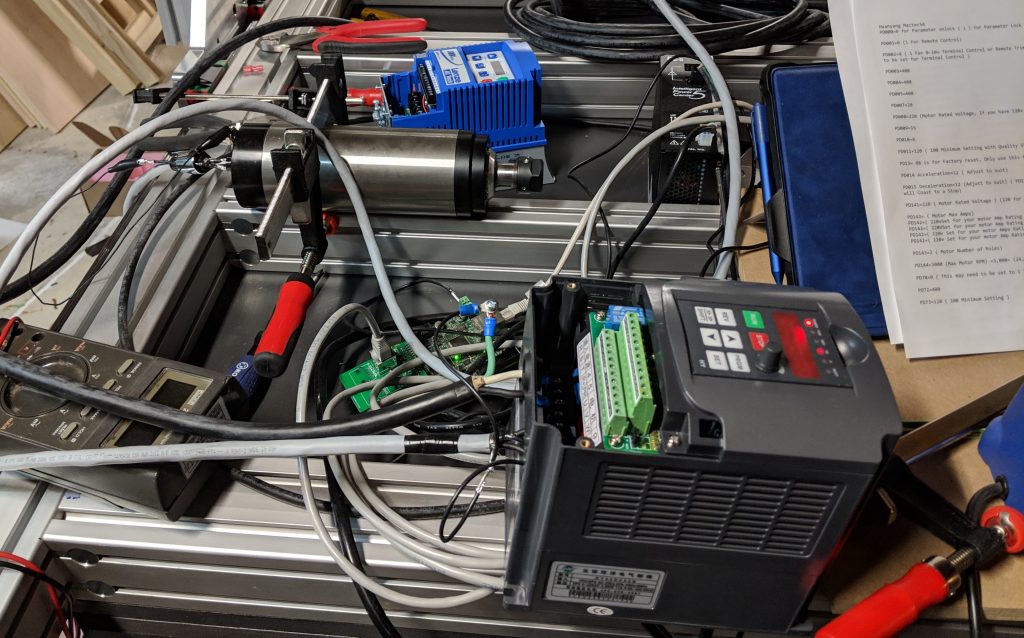 I did get both VFDs working, but ultimately the Lenze VFD fell short of expectations for me. The quality was good and it was easy enough to work with, but the main selling point of this unit (which is considerably more expensive than eBay VFDs) is that it offers vector speed/torque control, which is supposed to allow a much broader range of spindle speeds, maintaining respectable torque down to much lower RPMs than a traditional VFD.
However, I was never able to get the vector modes working. There’s an auto-tune function that is supposed to determine the motor parameters for vector control – but every time I tried it, it either failed to tune, or it completed but wouldn’t run the spindle. The other option is to enter motor parameters manually, but no such parameters were published for this type of eBay-grade spindle. Inquiring with the seller got me absolutely nowhere – they didn’t even understand the question.
The final nail in the coffin for the Lenze VFD was that certain valuable features – namely dynamic braking and modbus communications – are sold as add-on modules. Unfortunately, they’re also quite expensive – over $100 each – which would have pushed my total VFD cost to over $600.
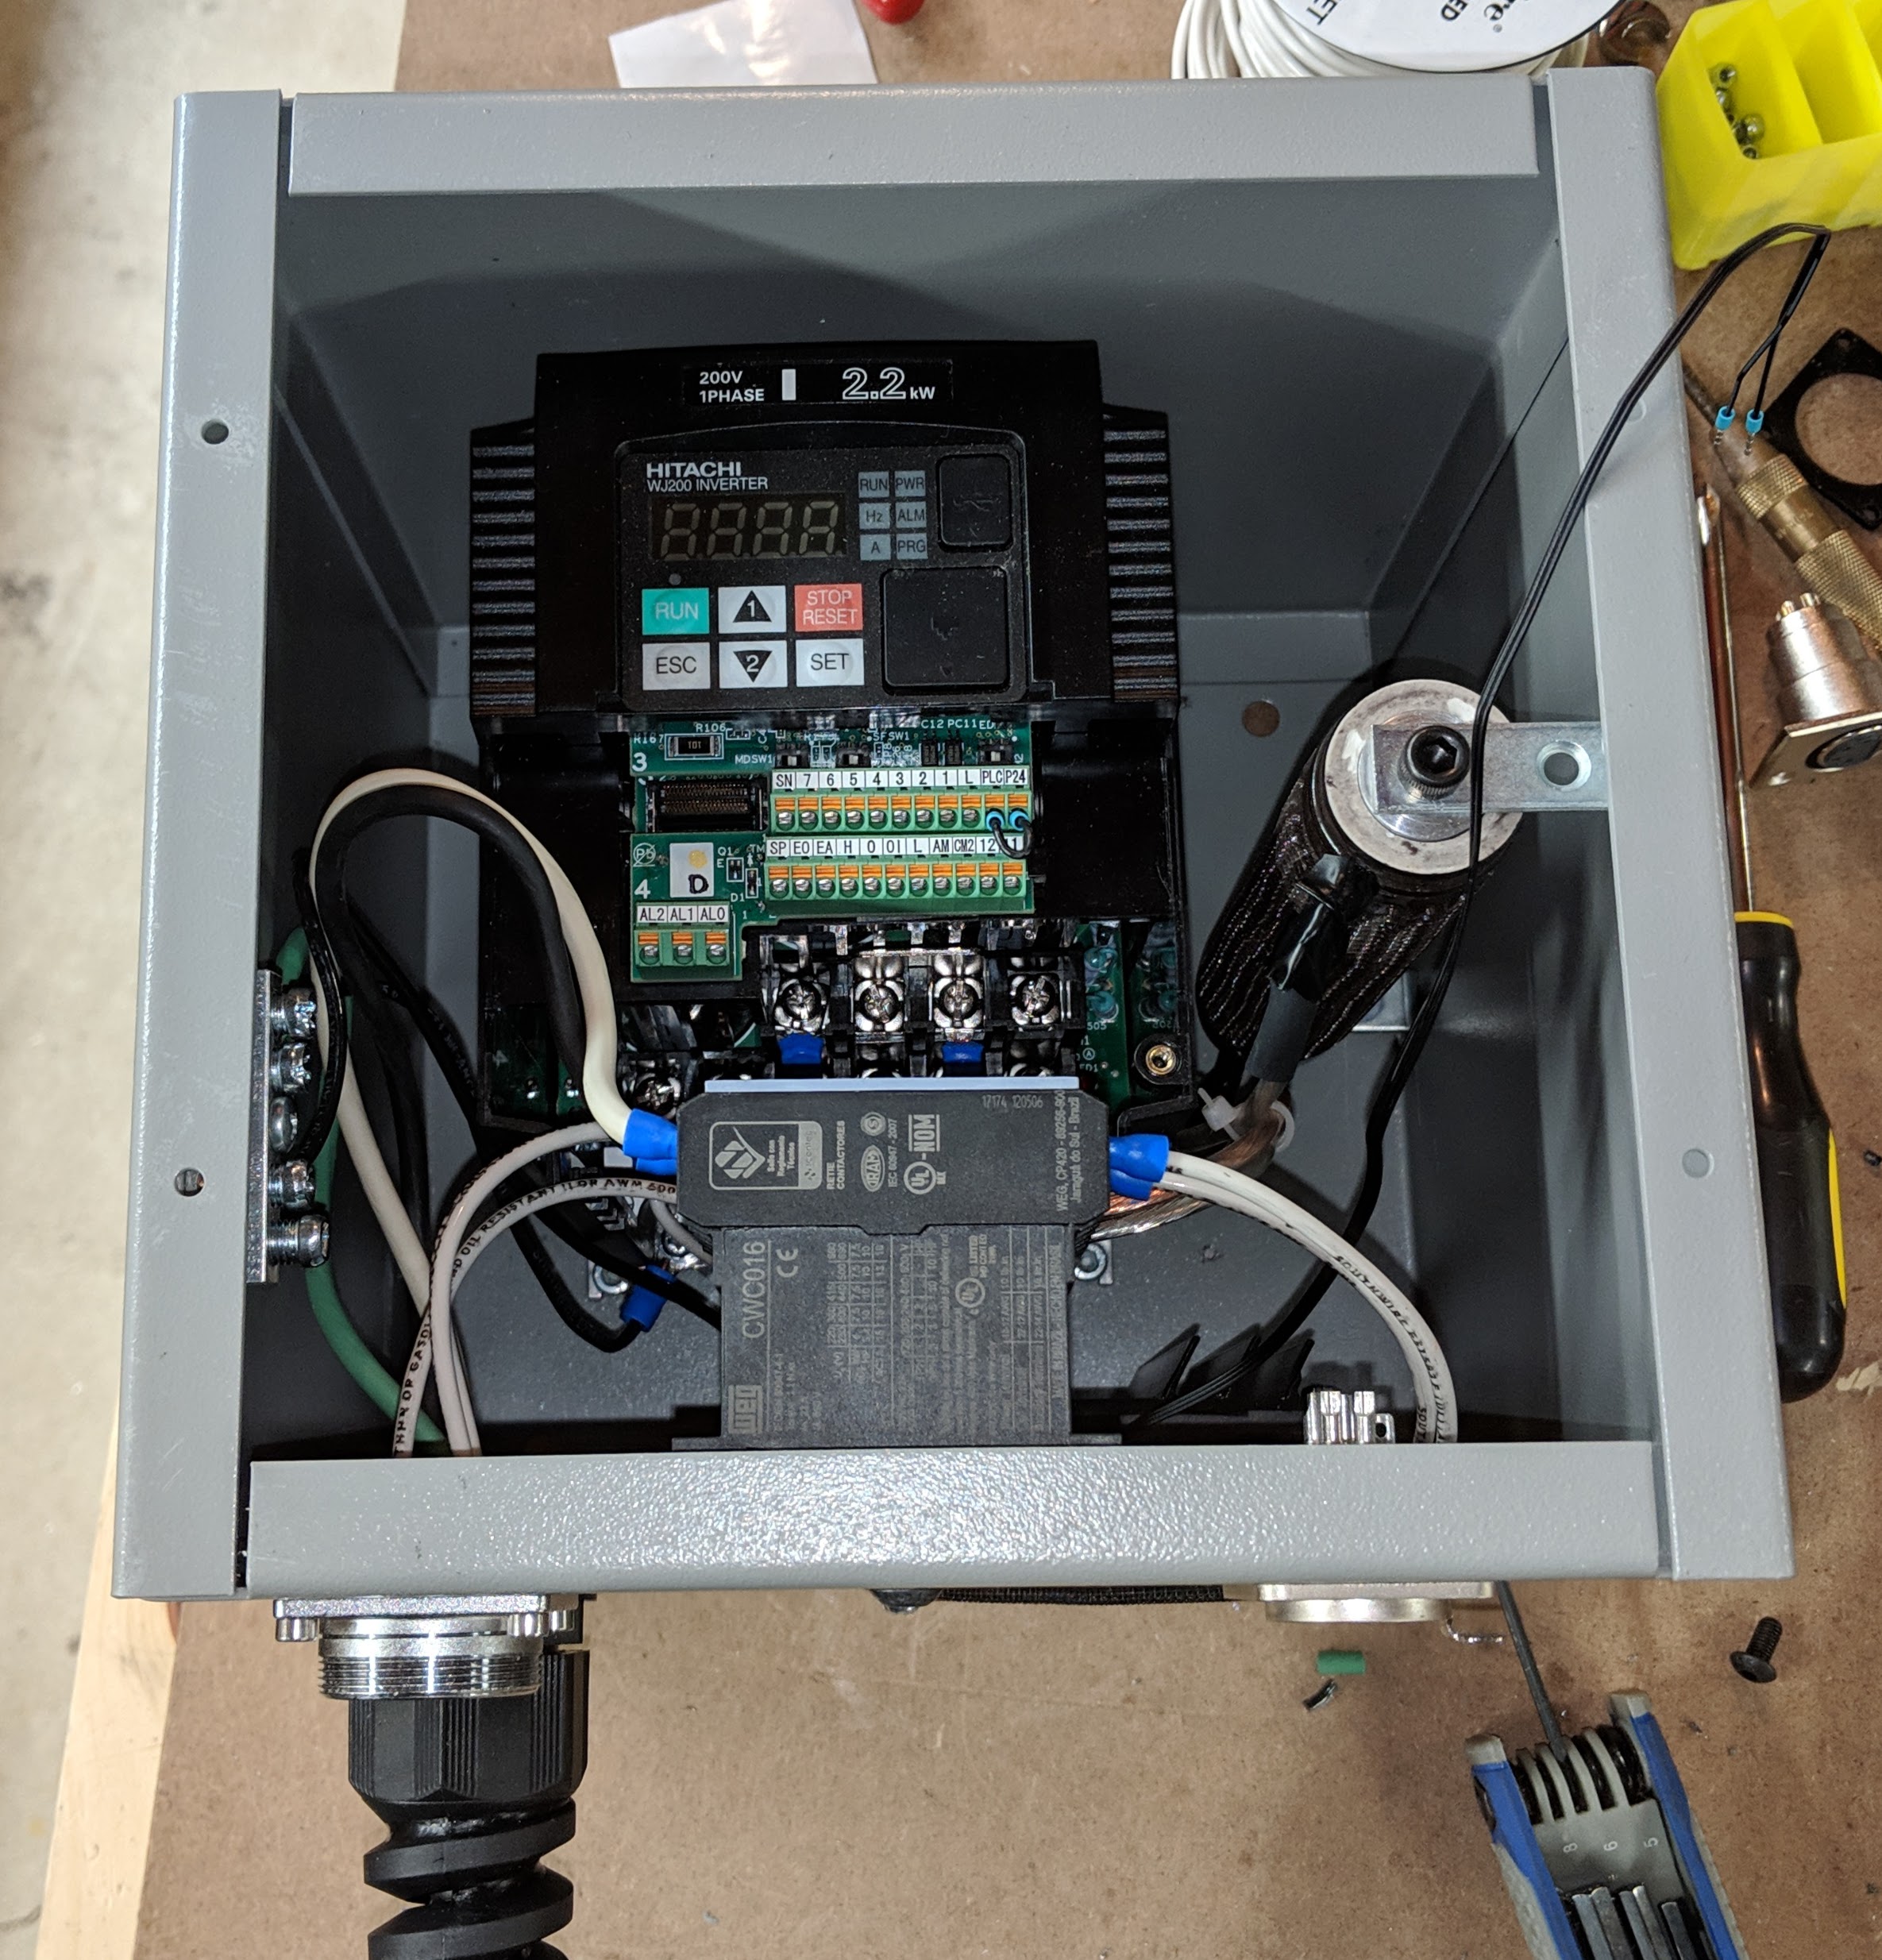
That put me over the edge, so I offloaded the Lenze VFD on eBay and bought a Hitachi WJ200-022SF to replace it. The Hitachi is very comparable in price to the Lenze, but it natively supports modbus control and it contains a built-in braking unit. Braking still requires adding an external braking resistor, but that’s a problem that can be solved with careful selection of high-power resistor – which can be found cheaply as surplus.
This leads me to an important lesson learned – there are compact chassis-mount, aluminum-body wirewound power resistors readily available – usually gold-anodized. I tried to use them, but each one failed (open-circuit) during the very first braking event. These resistors are commonly rated for 50W, but the job of braking a spindle involves a very short, high-current spike lasting a second or less – somewhat of an impulse. In my experience, that proved to be too much for the resistive wire coil in these resistors.

Instead, look for tubular-style ceramic power resistors, consisting of wire or metal ribbon wound on a hollow ceramic core. They’re quite a bit larger – typically 6 to 8 inches long and an inch or more in diameter – but they are able to absorb the current impulse involved in use as a spindle braking resistor.
The inertia of a typical 400Hz router spindle is not that large, so the total amount of kinetic energy that needs to be dumped into the braking resistor per braking event is not tremendous. In practice, I found that the resistor will warm up enough to feel the difference by touch, but even after repeated braking cycles in quick succession it still didn’t get hot enough to be concerning.
Why is braking important?
Spindle braking is something I didn’t know I needed before I bought my first VFD, but the value became apparent pretty quickly. High-speed spindles necessarily have decent bearings and balance, so once spun up to 24000 RPM they can take many seconds to spin down to a stop if allowed to freewheel.
Personally, that was enough to get me concerned about safety – in the event of a problem during operation, when the machine needs to stop due to a detected fault or operator intervention, I’d really prefer for the spindle to not keep spinning for 10+ seconds. (Of course, if it was actually cutting material at the time, then it would stop much more quickly)
VFDs can actively slow the spindle down, faster than the inherent friction would otherwise achieve, but their ability to do so is relatively limited without somewhere to dump energy. VFDs work by taking the AC input power (240V 60Hz single-phase, in my case) and rectifying it to high-voltage DC which goes into very large storage capacitors. The VFD uses power transistors (e.g. IGBTs) to drive each of the 3 motor phases with an AC waveform, which is synthesized from the HV DC. When braking, the spindle motor actually acts as a generator, and the VFD is able to dump power from the spindle back into the HV capacitor bank, which charges these capacitors to a higher voltage than the nominal level of the rectified input power.
Here a limitation comes in, because the capacitors, transistors and all other associated circuitry can only tolerate just so high a voltage. Any decent VFD is smart enough to protect itself from overvoltage by stopping the braking action – usually manifesting as a brief period of braking, followed by tripping a fault condition – after which the spindle freewheels the rest of the way to a stop. Braking using this method can still achieve a modest improvement in deceleration time, but in my experience it was still a few seconds at best.
Dynamic braking solves this problem with the use of another high-power transistor on the HV DC bus, which can turn on once the DC voltage rises above some threshold, dumping the excess energy into the external high-power resistor. With this method, braking can be substantially faster – I’ve got my deceleration time set to about 1 second. I’ve tested it to even faster values, but it starts to get kind of violent – more like slamming the spindle to a stop, which doesn’t sound good and can’t be great for the spindle.
VFD Installation
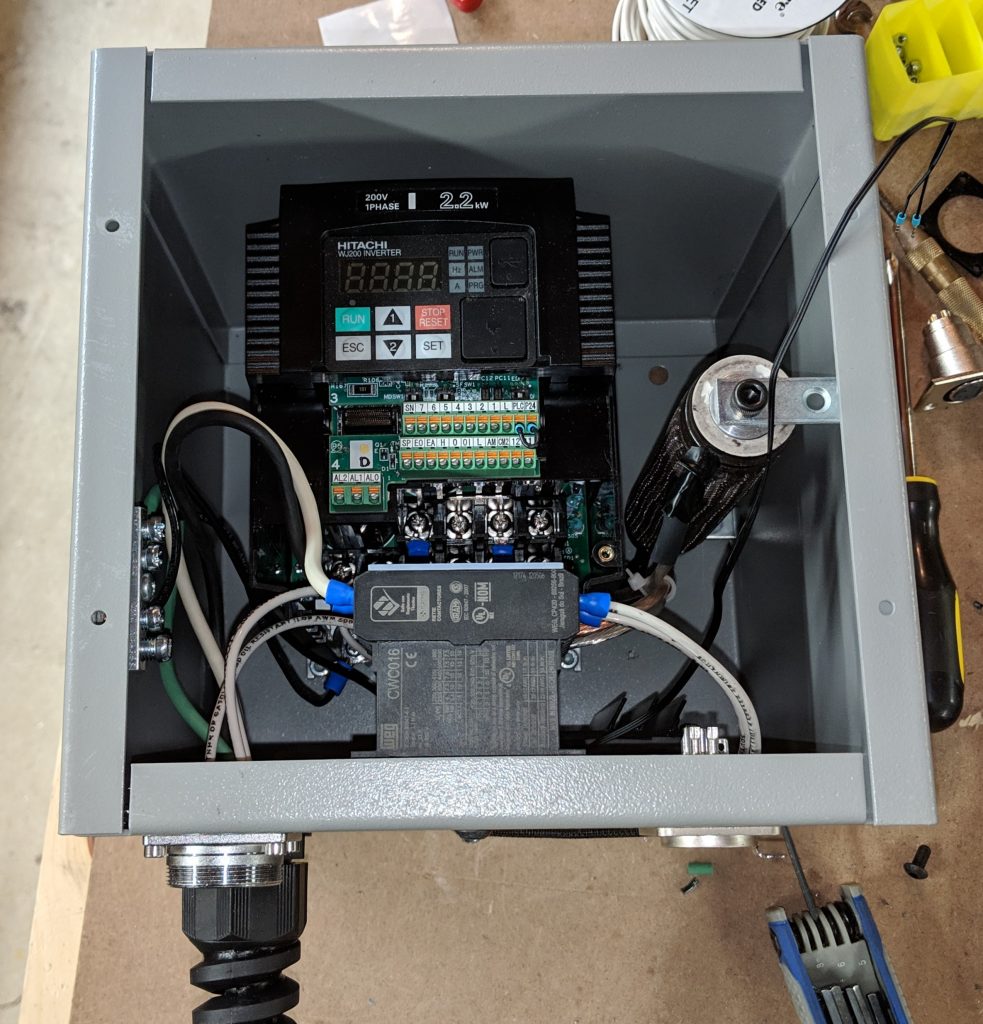 Due to the higher voltages, heat and electrical noise associated with the VFD, I elected to install it in its own box, separate from the rest of the machine control electronics. The box I ended up with is a pretty tight fit, but I was able to get the VFD, braking resistor, auxiliary cooling fan, and a 30A contactor all in there. An XLR jack brings in lines from the main control box including power to the 12V fan, 12V to switch the contactor (which switches 240V power to the VFD) and RS-485 for Modbus control (more on that in a future article)
 I
I 